Ecommerce Google Analytics 4 Verification Checklist. A Spilno Agency Template


Before we spend the first euro on Google Ads or Meta Ads, the Spilno Agency team always runs the same check — making sure ecommerce tracking in Google Analytics 4 actually works. If the purchase event never arrives, or arrives without value, your ads are flying blind: the Google optimiser has no idea what a conversion is and burns budget on the wrong people. In this article — our 7-step checklist and the Google Sheets template we use on every client project.
Why you must always verify GA4 ecommerce events before launching paid ads
Launching Google Ads or Meta Ads without proper analytics is like driving down a motorway at night with the headlights off. You can see there is a road, but you have no idea where it leads or whether it is safe. Google Smart Bidding and Meta Advantage+ algorithms learn from data: the more accurately you fire purchase with a valid value, the faster your ads find the right audience.
The second reason is the cost of error. If during the first week pixels report 2× more purchases than really happened (duplicate add_to_cart counted as purchase), the optimiser will inflate bids. A month later you’ll see ROAS at 50 % of the real number and the client will conclude the channel doesn’t work. The real issue is the data.
The third reason is attribution. If transaction_id isn’t sent, GA4 counts the same purchase multiple times (every refresh of the thank-you page becomes a new event). In Google Ads, imported conversions inflate by 3–10×. ROAS on paper is great, the cash register is empty.
- Smart Bidding optimises what it sees — if
purchasehas no validvalue, bids are tuned to noise - Duplicate events (one purchase = 2–5 hits) inflate conversions and ROAS in both Google Ads and GA4
- Without
currencyonpurchase, Google Ads imports conversions in the account currency, corrupting data for multi-currency stores - Without
view_itemyou cannot run dynamic remarketing in Google Ads (Performance Max, Demand Gen) - Without correctly set
item_list_idonview_item_list, you can’t see which categories convert better
9 essential ecommerce events in GA4
In Google Analytics 4 ecommerce events are a separate standard documented by Google in the Measurement Protocol. Not all are mandatory, but to build a complete funnel from the first view to checkout, you need at least 9. Here they are, in the order they appear in the funnel.
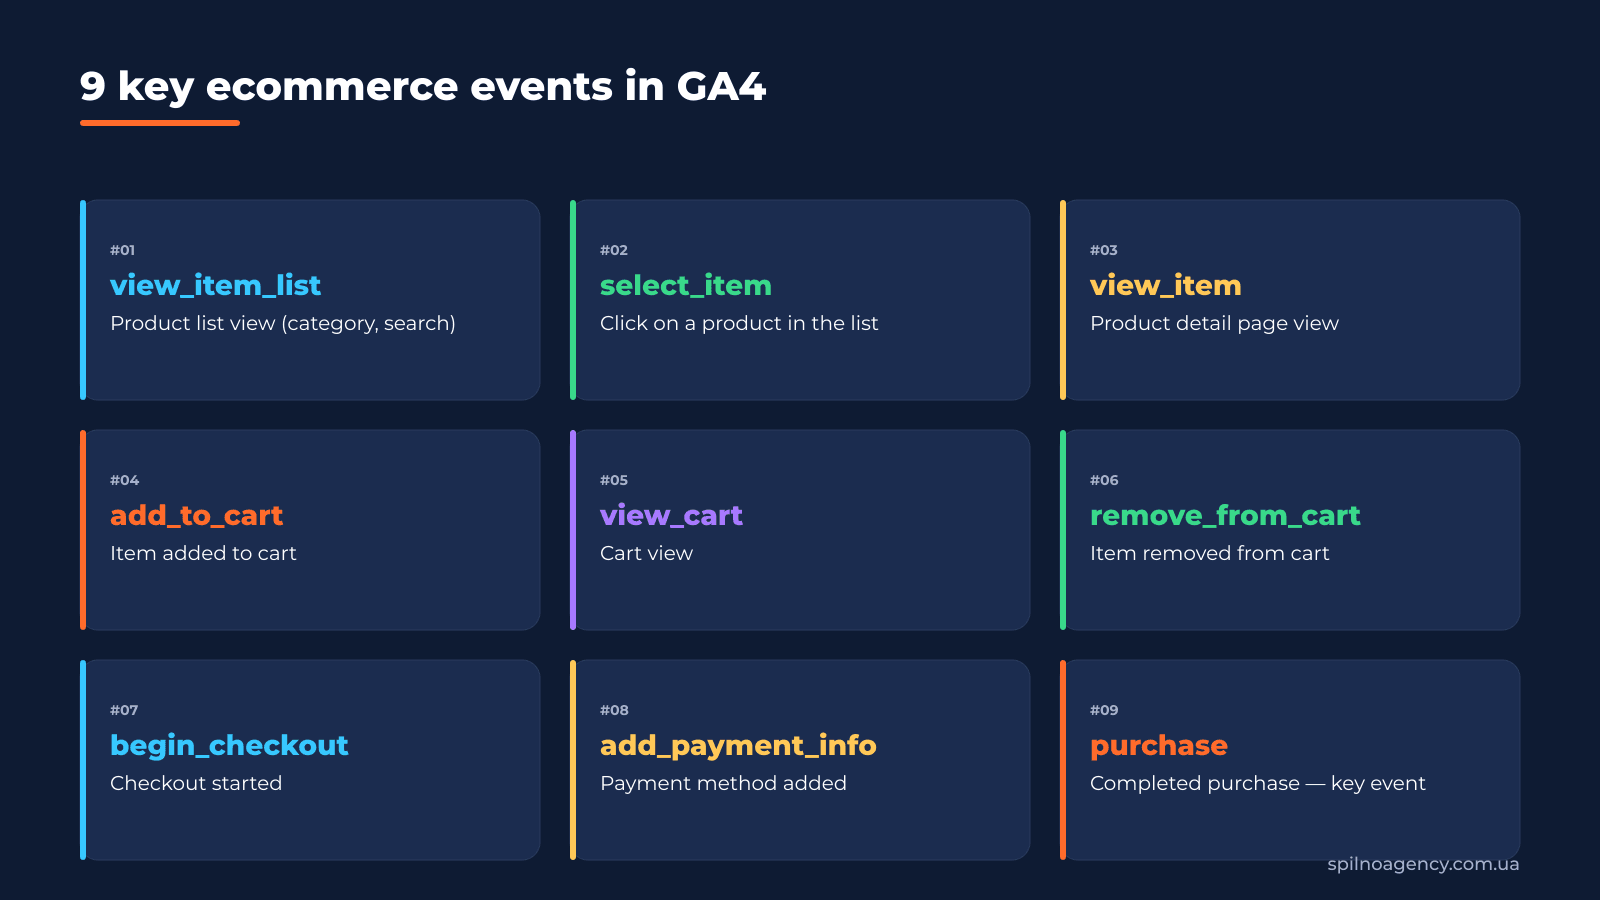
view_item_list— User opens a category, search results or product list page. Parameters:item_list_id,item_list_name, anitemsarray.select_item— Click on a product card in the list. Same parameter structure as view_item_list, but for one specific product.view_item— Product detail page view.currency,valueand anitemsarray withitem_id,item_name,priceare mandatory.add_to_cart— Item added to cart. Parameters:currency,value,itemswithquantity.view_cart— Cart page view. Without it you have no data for CRO analysis — you won’t see how many people open the cart but never proceed.remove_from_cart— Item removed from cart. Helps you understand which products feel wrong once price / shipping become visible.begin_checkout— Checkout started. This is your benchmark for the Cart-to-Checkout conversion rate.add_payment_info— Payment method added. Optional, but useful — the largest drop-off in any funnel sits between this step and the purchase.purchase— Completed purchase. Required parameters:transaction_id(unique!),value,currency,items,shipping,tax. It is the GA4 key event and your main Google Ads conversion.
GA4 recognises all of these events out of the box — you don’t have to create them manually under Custom events. Your dataLayer simply needs to push them with the right names and parameters. GA4 picks them up automatically and surfaces them in the Ecommerce and User journey reports.
7-step checklist to verify ecommerce GA4 before launching Google Ads
This is our working checklist. Each step closes a separate risk before the client sees the first paid impression. All seven steps are already inside our Google Sheets template — link is below.
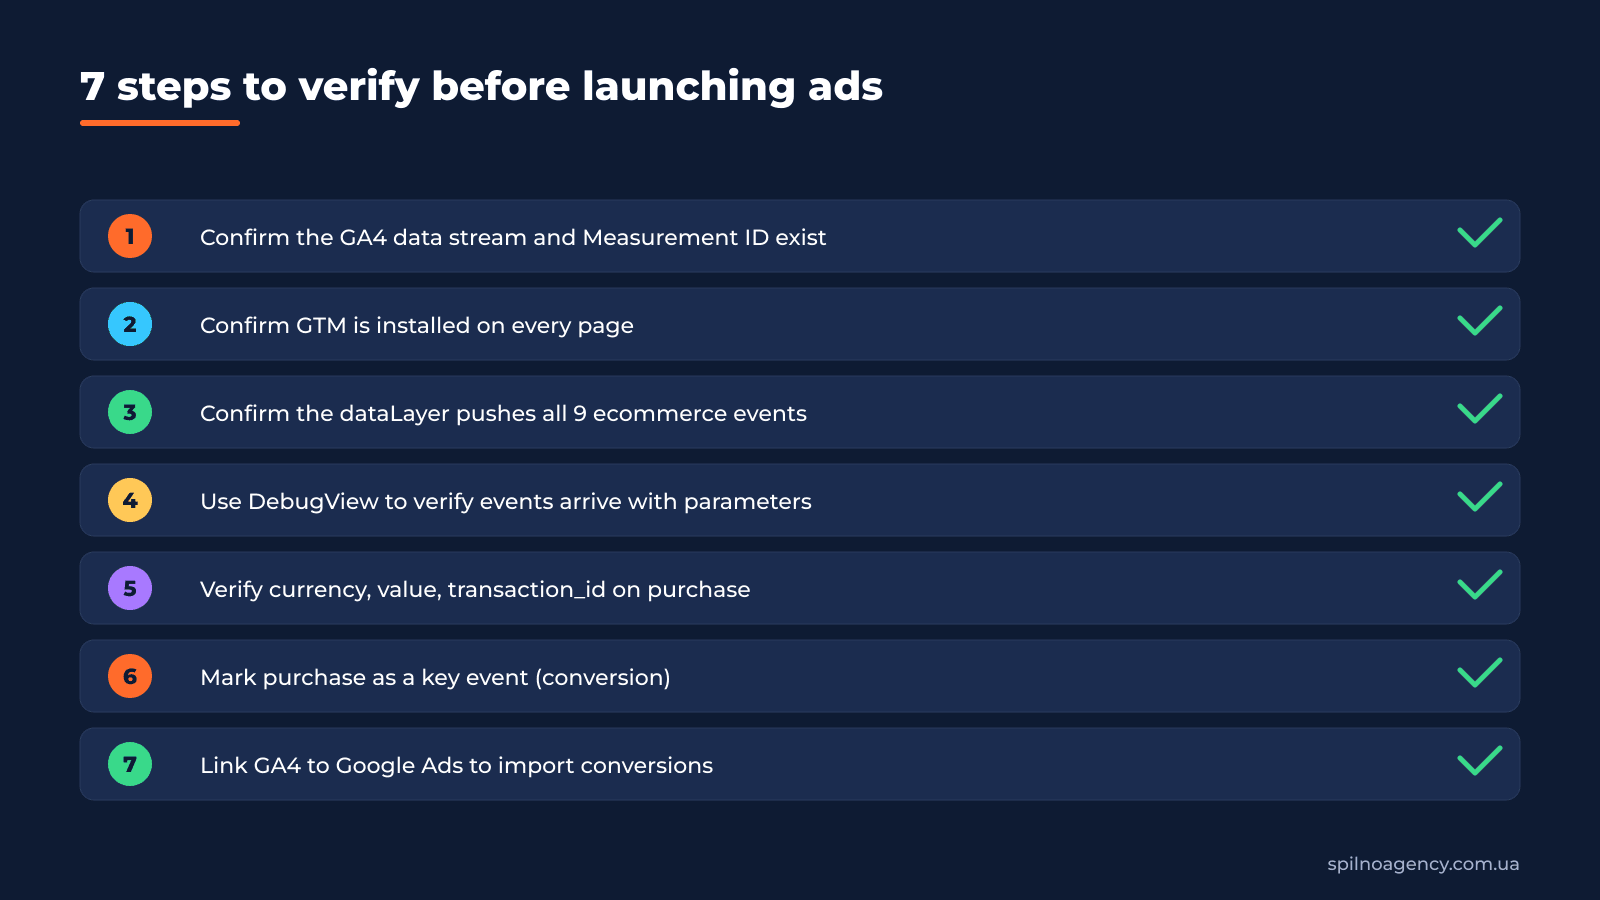
- Step 1. GA4 data stream and Measurement ID. Open Admin → Data Streams. Confirm there is one stream (not duplicates) and the Measurement ID (G-XXXXXXX) matches the one used in GTM tags. Two streams on the same site means half of your events go to nowhere.
- Step 2. GTM on every page. Use DevTools → Network → filter
gtm.jsto confirm the container loads on home, category, product, cart, checkout and the thank-you page. Special attention on thank-you: that is wherepurchasefires. - Step 3. dataLayer pushes 9 events. Open DevTools → Console → type
dataLayer. Walk through the entire funnel and see what gets pushed. All 9 events with the right parameters must be there. Ifview_itemarrives withoutvalue, that is a blocker. - Step 4. DebugView in GA4. Open GA4 → Admin → DebugView, enable debug mode (GTM debug or the GA Debugger extension), make a test purchase. Confirm
purchasearrives with all parameters and the righttransaction_id. - Step 5.
purchaseparameters. In DebugView open the Event parameters tab:transaction_idmust be unique,valuea number (not a string!),currencyin ISO 4217 (USD, EUR, UAH),itemsa non-empty array. One missing field and the ad algorithm trains on the wrong signal. - Step 6. Mark as key event. In GA4 → Admin → Events find
purchaseand toggle Mark as key event. Without this Google Ads cannot importpurchaseas an optimisation goal. - Step 7. Google Ads ↔ GA4 link. In GA4 → Admin → Product links → Google Ads create the link. In Google Ads → Tools → Conversions import the
purchasekey event from GA4. Confirm the status is Recording and attribution is Data-driven (not Last click).
3 tools to verify GA4 events
No single tool gives the full picture. We always combine three: DebugView shows how GA4 interpreted the event, GTM Preview shows whether the tag fired correctly, Chrome DevTools shows whether the hit reached Google at all.
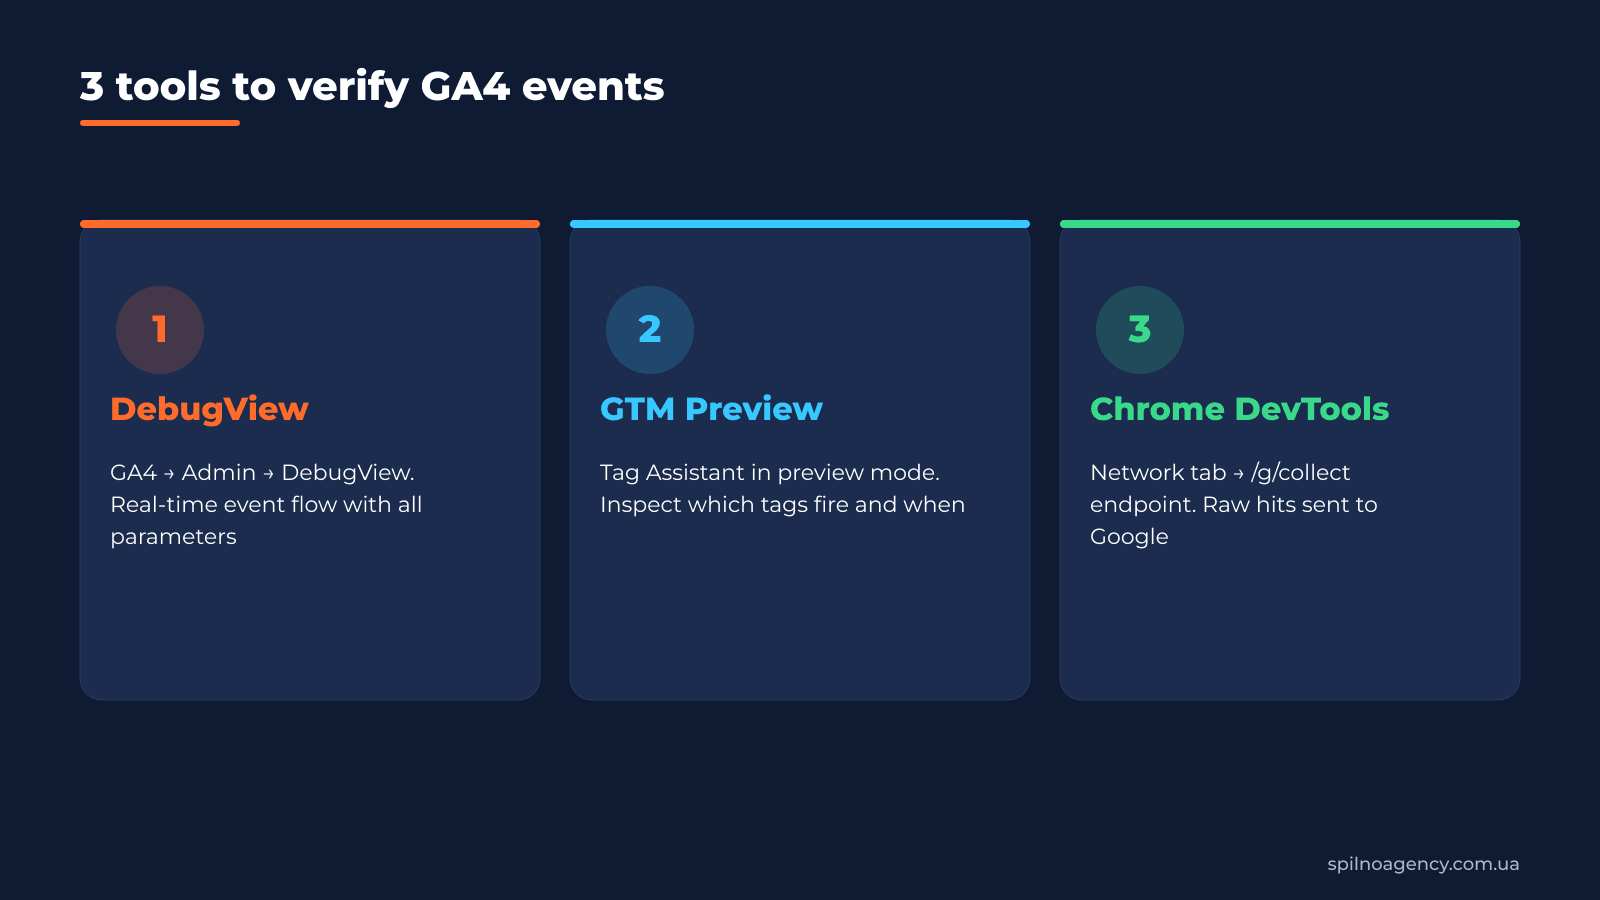
DebugView is the admin panel inside GA4 that lets you see every event from your device in real time. You enable it via the Google Analytics Debugger Chrome extension or via GTM preview mode. You see the event itself and all of its parameters — this is the final check before launching ads.
GTM Preview is Google Tag Manager’s preview mode. It shows which tag fired and when, which triggers matched, which variables were passed. If your GA4 Event — purchase tag did not fire on the thank-you page, Preview tells you in 2 seconds. Chrome DevTools → Network is the lowest level. Here you see whether the hit to /g/collect actually left for Google’s server. If Preview is happy but Network shows nothing, an adblocker or a CSP rule is blocking the request.
The Spilno Agency checklist template in Google Sheets
We use the same checklist template across every client project — from a Ukrainian fashion marketplace to an EU auto-parts store. It already contains:
- A table of the 9 ecommerce events with GTM / dataLayer / DebugView / Google Ads import check-boxes
- A dedicated sheet for
purchaseparameters — to verify each field one by one - A Common mistakes sheet — 12 issues we’ve seen on real client projects and how to diagnose them
- An Owner column — to lock in who is responsible (PM, dev, analyst)
- A Status column with 4 values: To check / In progress / Passed / Failed
- A Verification date column — to freeze the moment of a successful check and catch regressions later
Save the template to your own Google Drive
Click Save to Google Drive — Google opens its Make a copy dialog automatically. The copy lands in your Drive and you can freely edit it for your project. The original Spilno Agency template stays untouched — you can always compare changes.
If you are a freelancer or an agency, the template is yours to adapt — change the colours, add a logo, rename the sheets. We don’t mind: this is not a commercial product, this is a tool we share with the market.
Common mistakes and how to avoid them
Here are 6 problems we regularly find when auditing new client GA4 setups.
- Duplicate
purchaseon thank-you page reload. If the event is tied to page load and not to a server callback, refreshing the thank-you page produces +1 purchase. The fix: deduplicate bytransaction_idin a GTM custom variable and block repeated pushes. valuesent as a string, not a number.value: "1500"is not the same asvalue: 1500. GA4 accepts the number form; the string form is silently ignored. Check the parameter type in DebugView.- Missing
currency. If your store serves UA, EU and US customers, an emptycurrencyonpurchaseforces GA4 to log every order in the account default currency. The Revenue report no longer matches reality. add_to_carton every + / − click. If the cart lets users bump quantity with a + button, do not push the event on every click. Otherwise Cart additions inflate 5–10×.view_itemon a list page. Developers often confuseview_item(single product card) withview_item_list(a category). Check: a category page must pushview_item_listwith an array; a product page must pushview_itemwith one object insideitems.- Purchase with
value: 0. Test or promo orders withvalue: 0are interpreted by Smart Bidding as a free sale and bids drop. Filter such orders at the GTM or server-side layer.
FAQ
What should I check first if GA4 ecommerce isn’t working?
Open DebugView, run the site in debug mode (GA Debugger extension) and walk through the customer journey. If purchase never shows up in DebugView, the issue is the dataLayer or your GTM tags. If it shows up but parameters are empty, the issue is in the GA4 Event tag parameter mapping.
Do I need to create GA4 ecommerce events manually?
No. GA4 recognises the 9 standard ecommerce events by name automatically — you don’t need to create them under Custom events. Just push them from the dataLayer with the right names and parameters and the GA4 tag in GTM will forward them intact.
How often should I run this checklist?
The first time — mandatory before launching any paid campaign. After that — once a quarter as a planned check, plus after every site release, every checkout template change, every new currency or language. Any frontend update can break the dataLayer.
Can I use the template for Shopify / WooCommerce / OpenCart?
Yes. The template describes the events that must arrive, regardless of who emits them. Shopify and WooCommerce have official integrations that emit these events out of the box. The checklist stays the same — you just spend less dev time.
What if transaction_id repeats?
GA4 silently drops a new purchase with an existing transaction_id — this is duplication protection. But if you accidentally generate the same ID for different orders (for example, timestamp without milliseconds), you will lose part of your purchases. Audit the ID generation logic on the backend.
Bottom line
Verifying ecommerce GA4 is not a technical formality, it is budget protection. If you spend €10,000 per month on Google Ads and 20 % of your purchases are missing or duplicated, you are paying €2,000 per month just for noise. Run the 9-event checklist, save the template to your own Google Drive and re-use it before every new campaign you launch.
Save the template to your own Google Drive
Click Save to Google Drive — Google opens its Make a copy dialog automatically. The copy lands in your Drive and you can freely edit it for your project. The original Spilno Agency template stays untouched — you can always compare changes.
This article is part of a free course:
Google Analytics Course
To unlock the quiz after this article and track your progress, sign up (or sign in) and start the course in your personal dashboard.
Knowledge Test
You get only 1 attempt at this quiz — read every question carefully before answering. You need at least 80% correct answers to pass.

Read also

Is an SEO specialist responsible for leads and sales? Our position
A LinkedIn discussion: should an SEO specialist be responsible for leads and sales from the SEO channel. Spilno…
How to Control an SEO Specialist: The 5-Stage SEO KPI Funnel
SEO KPIs form a chain of five metrics that show, step by step, whether your SEO is actually…
Best CMS for an Online Store: Cloud vs Self-Hosted Platforms in 2026
Compare Shopify, WooCommerce, PrestaShop, OpenCart and Magento for your online store. Pros, cons, and a step-by-step CMS selection…